> For the complete documentation index, see [llms.txt](https://docs.wcproducts.com/welcome/llms.txt). Markdown versions of documentation pages are available by appending `.md` to page URLs; this page is available as [Markdown](https://docs.wcproducts.com/welcome/competitive-concepts/wcp-cc-2026/assembly-instructions/feeder.md).
# Feeder
## Step 1
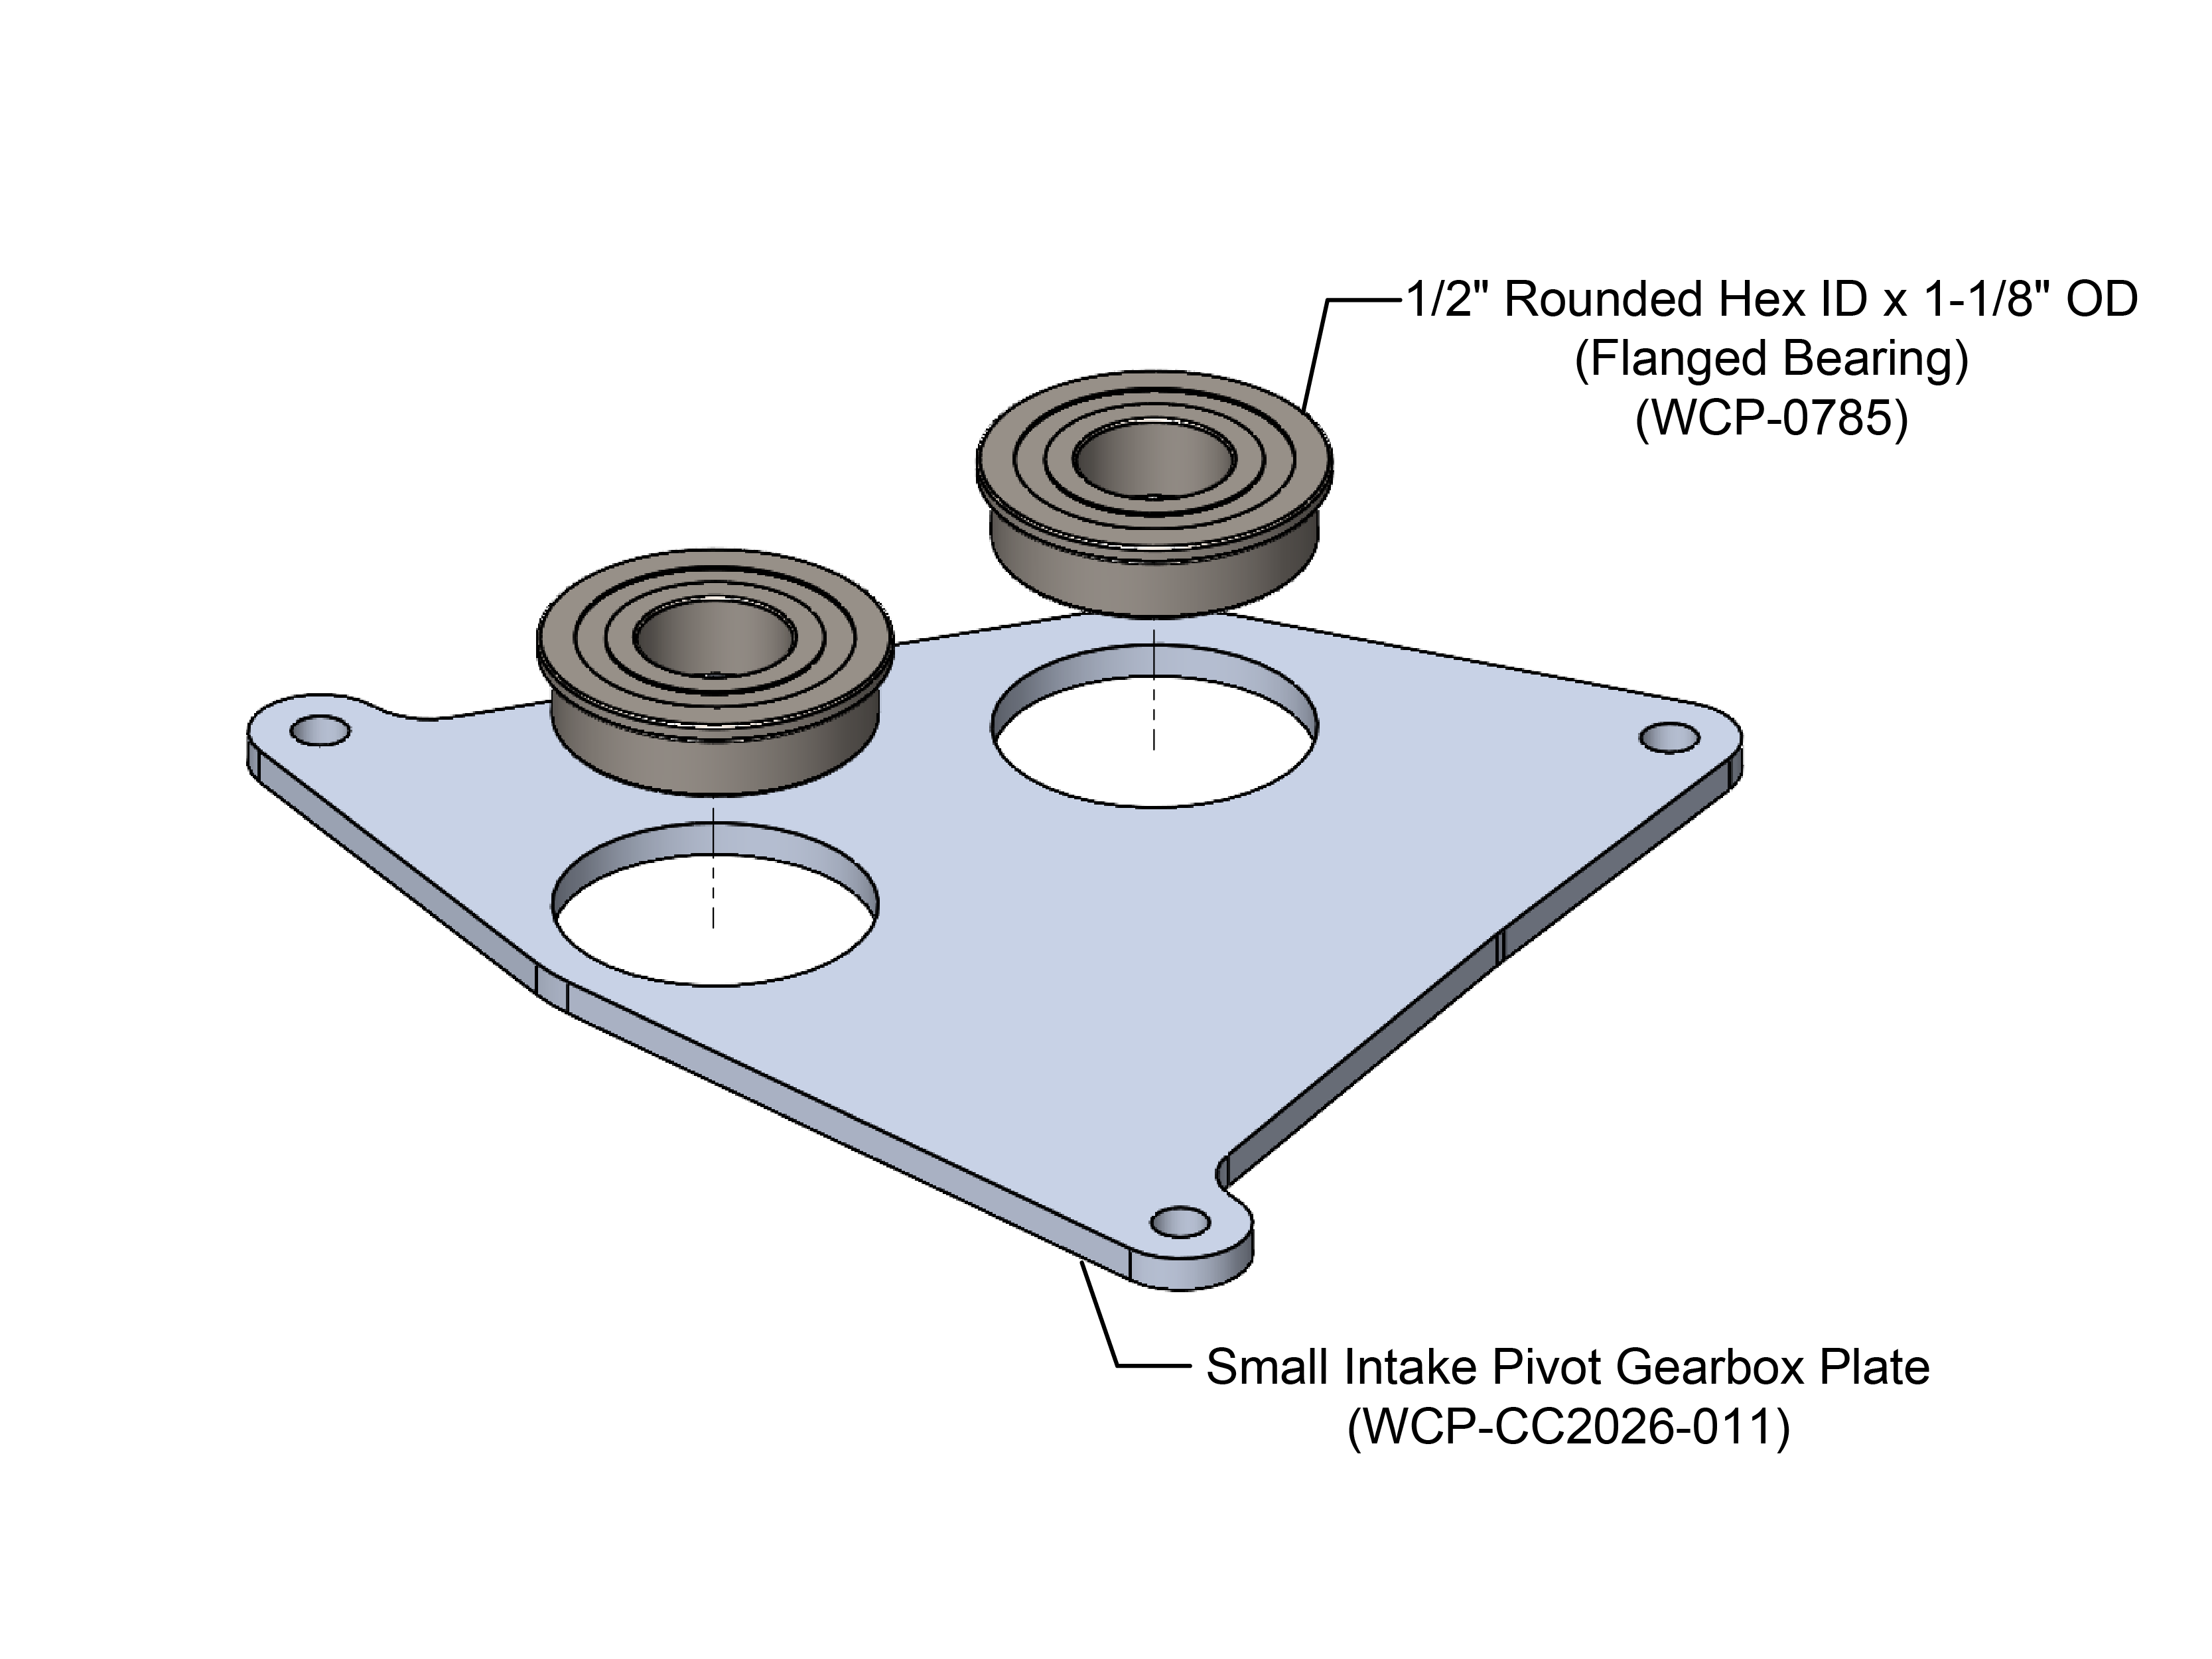
Install the Bearings into the Feeder plates as shown below
{% tabs %}
{% tab title="Pivot Gearbox Plates" %}
Large Intake Pivot Gearbox Plate
Large Intake Pivot Gearbox Plate
{% endtab %}
{% tab title="Middle Feeder Plates" %}
Press the bearing into the Middle Feeder Plates. Repeat this step for the other side. Be sure to press the bearing in from the opposite side on the second plate so that the bearing flanges are on opposite sides of the plates.
Middle Feeder Plates
{% endtab %}
{% tab title="Outer Feeder Plate" %}
Outer Feeder Plate
{% endtab %}
{% endtabs %}
## Step 2
Fully capture the Bearings installed in Step 1 using a Bearing Retention Plate and Roller Center Plates as shown below. Secure the plates using #10-32 bolts.
{% tabs %}
{% tab title="Pivot Gearbox Plates" %}
{% hint style="success" %}
The highlighted holes on the Bearing Roller Center Plate must be drilled out to 0.201".
{% endhint %}
{% endtab %}
{% endtabs %}
## Step 3
Install the Feeder Guards onto the Middle Feeder Plates and the Outer Feeder Plates from Step 2 using #10-32 x 1/2" Bolts and Nuts as shown below.
{% hint style="info" %}
Do not install the Feeder Guard onto the Intake Pivot Gearbox Plate as this will be done in the next step.
{% endhint %}
## Step 4
Assemble the Intake Pivot Gearbox by sliding the needed Shafts and Gears into the neccessary locations. Secure this using #10-32 Bolts and Nuts as shown below.
## Step 5
Mount a Kraken X60 onto the Assembly from Step 4 using #10-32 x 1-1/2"L Bolts and 1-1/8"L Spacers as shown below.
## Step 6
Install the pulleys and flex wheels as shown below and secure them using #10-32 x 1/2"L bolts
{% tabs %}
{% tab title="Pivot Gearbox Plate" %}
{% endtab %}
{% tab title="Middle Feeder Plates" %}
{% endtab %}
{% tab title="Outer Feeder Plate" %}
{% endtab %}
{% endtabs %}
## Step 7
Install the Kraken X60 and 12t Pullet onto the Outer Feeder Plate from Step 6. Secure this using #10-32 x 1/4"L and #10-32 x 3/8"L Bolts as shown below.
## Step 8
Slide the 24"L Rounded Hex shaft and 30t Pulleys into position. Make sure that the appropriate spacers are being used.
{% hint style="warning" %}
Do not forget to install the 170t Rubber Coated Belts in this step.
{% endhint %}
{% tabs %}
{% tab title="Exploded View" %}
{% endtab %}
{% tab title="Spacer Beakdown" %}
{% endtab %}
{% endtabs %}
## Step 9
Secure the feeder together by installing 6"L Standoffs and securing them using #10-32 Bolts as shown below.
{% tabs %}
{% tab title="Outer Feeder Plates" %}
{% hint style="warning" %}
Do not forget to install the 3/4"L Spacers between the Outer Plates and the 6"L Standoffs.
{% endhint %}
{% endtab %}
{% tab title="Inner Feeder Plates" %}
{% hint style="warning" %}
Do not forget to install the 1/8"L Spacers between the Outer Plates and the 6"L Standoffs.
{% endhint %}
{% endtab %}
{% endtabs %}
## Step 10
Install 2"L Nutstrips using #10-32 x 3/8"L Bolts as shown below.
Repeat this step for the other side of the assembled Feeder. Be sure to install the Nutstrips from the opposite side.
{% hint style="info" %}
Drill out the highlighted holes. These will be used when installing the feeder system to the robot drivetrain.
{% endhint %}
## Step 11
Install the Feeder floor using zipties.
---
# Agent Instructions
This documentation is published with GitBook. GitBook is the documentation platform designed so that both humans and AI agents can read, navigate, and reason over technical content effectively. Learn more at gitbook.com.
## Querying This Documentation
If you need additional information that is not directly available in this page, you can query the documentation by asking a question.
Perform an HTTP GET request on the following URL with the `ask` and `goal` query parameters:
```
GET https://docs.wcproducts.com/welcome/competitive-concepts/wcp-cc-2026/assembly-instructions/feeder.md?ask=&goal=
```
`ask` is the immediate question: it should be specific, self-contained, and written in natural language.
`goal` is what the user is ultimately trying to achieve, the reason they need the answer. Sharing it helps GitBook give you a better, more relevant answer. A goal is most helpful when it describes the outcome the user wants rather than restating the question. For example, with `ask=how do I create an API token`, a goal like `automate deployments from our CI pipeline` lets GitBook tailor the answer to that use case.
The response will contain a direct answer to the question and relevant excerpts and sources from the documentation.
Use this mechanism when the answer is not explicitly present in the current page, you need clarification or additional context, or you want to retrieve related documentation sections.